Don’t you just hate it when you finally get the hang of a reading or math program, and your district (or admin) decide it’s time to start using something new? I mean you’d think they’d know better than to mess with a teacher’s software… When that happened at my school, we were told to “trust the process” The only problem with that is that while the “process is going on”, we’re in the trenches having to figure out how to make things work.

When my school first switched to i-Ready, it took me a while to get the hang of it. But after a few months, I figured out a system that worked well for ME + MY KIDDOS So, if you’re feeling frustrated, just like I was in the beginning, please know that YOU•ARE•NOT•ALONE! Hopefully, by the end of this post, you’ll have a few new ideas to get you started.

The first step is to set up student folders
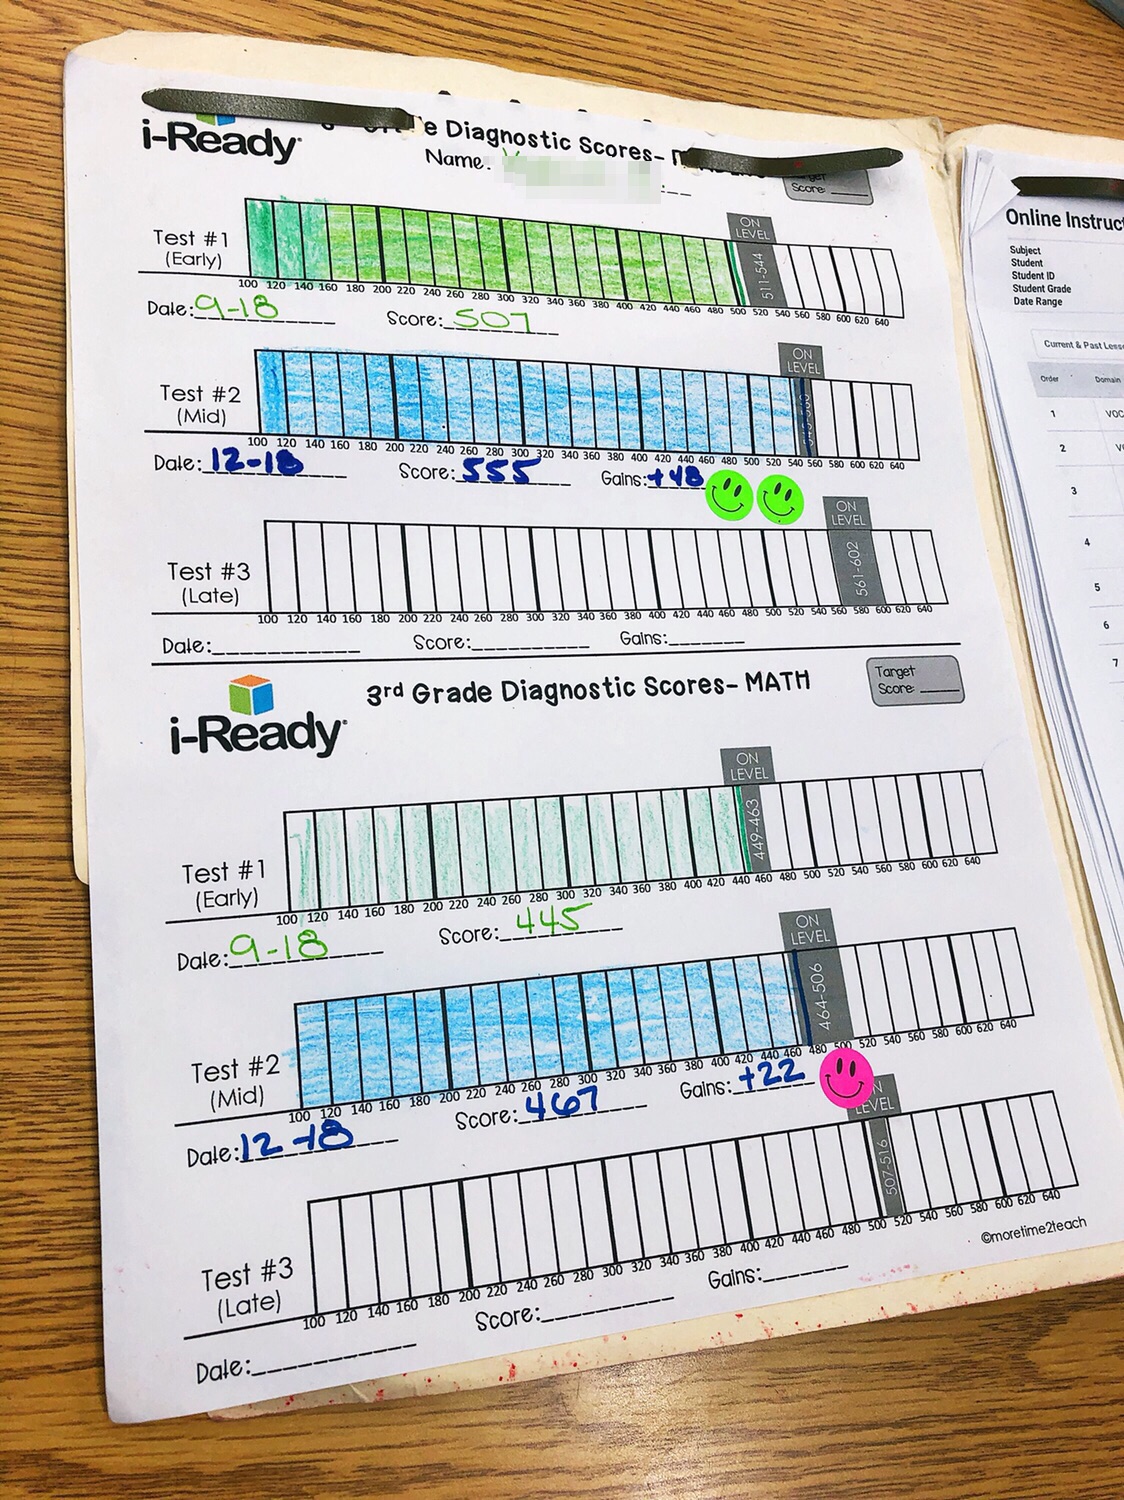
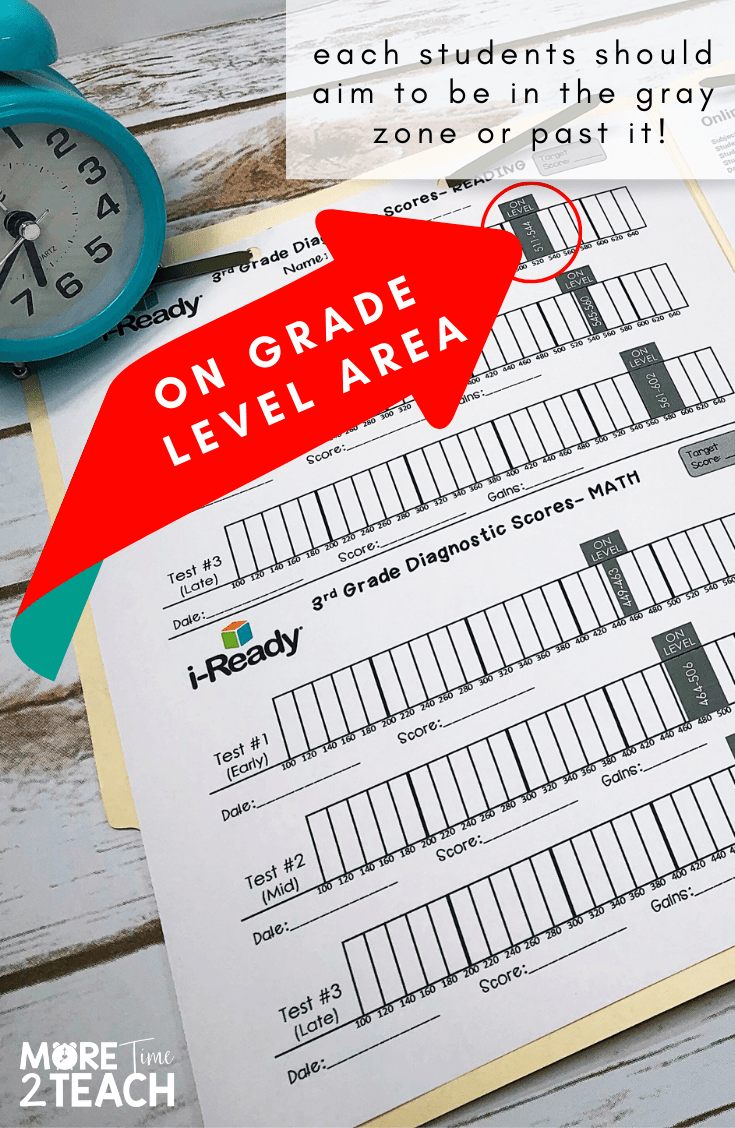
You’ll need a folder for each student, printed iReady labels, and a copy of the iReady student recording sheet. (If you’re interested in a free copy, simply enter your email in the form down below + I’ll get that right to you!)

I really like these folders. They have prongs on both sides + are pretty sturdy.

Label each folder to remind students + parents what to do.

Track + monitor student’s progress on each Diagnostic Test.
Help students monitor their progress on all i-Ready Diagnostic tests using these Recording Sheets... Simply enter your information down below and check your inbox!DOWNLOAD THIS FREEBIE NOW!
The last thing you’ll need for your folders is to print out a list of each students’ individual online assignments. (Yes, you need to do this for EACH student.) Don’t worry, thanks to a few new i-Ready updates, this is now REALLY easy to do! And once you get the hang of it, you can do it relatively quickly.
Here are some picturesto walk you through it…

Click on Monitor Online Instruction.

Upcoming lessons will be listed in the order that the students will see them.


What’s so great about this printout is that it shows you the order, grade level, and estimated time for each lesson. Parents no longer have to guess how much time to set aside for i-Ready at night or over the weekend. (Or if you rather complete i-Ready in the classroom, you also have a guide to help with planning.) Knowing the length of each lesson also allows you to determine how many lessons to assign each student on a weekly basis. One of the mistakes I made, in the beginning, was assigning my entire class 2 lessons per week … That is a big NO NO!
Here’s what a student folder looks like on the inside…

On the left is the recording sheet + on the right is the student’s online lessons.
Mid-year, when the kiddos take the diagnostic test for a second time, you’ll have to once again print out new assignment sheets for the entire class. (I usually print these out on colored paper so they stand out from Diagnostic #1 assignments.)
You’re probably wondering, ok so how do I decide how many minutes to assign each student.
Well,Curriculum Associates, the makers of i-Ready, recommends that students use i-Ready for a target of 45 minutes per subject per week (with a range of 30-49 minutes). My school districts requirement is a little different. According to my district, students performing on grade level must complete 45 min. of weekly instruction per subject. Those that are 1 year below grade level, complete 60 min. Lastly, anyone more than a year behind needs to complete 75 min. per week. Please keep in mind that these recommendations were given to me by my district. Where you teach, it might be a little different. Your gonna want to reach out to your Reading Coach or district to find out what their requirements are.

When planning assignments for my kiddos to complete for the week, I like to highlight the name of the lesson and its corresponding minutes. This is how I communicate with students + parents what lessons they need to do by the following Monday (I like to give them 7 days to complete their weekly i-Ready assignments).
I do the same thing for Reading + Math. While I’m highlighting, if I notice a student has a lengthy reading passage for the week, I give them a heads up. I also tell them that they can break the lesson up over a period of a few days. There’s no need for them to sit there for 45 minutes straight

It’s time to get the kids to buy-in.
Now that your folders are ready to go, it’s time to start working on your kiddos. You need to get them on board! Student involvement and motivation is an essential part of the success of ANY program.
Begin by having 1:1 data chats with your students. They don’t have to be long, maybe 2-3 min. at most. During these chats, discuss the results of the diagnostic assessment. It’s important to be encouraging + positive but also truthful! For those students that are working below grade level, it’s time to get REAL. Don’t sugar coat it! Show them their recording sheet and where they fall on the graph. Explain to them that the gray area is where they should or need to be. You can even grab a marker and draw a line showing them how close or far away they are to that area.

This chart is great because it gives students a visual representation of what their number score really means. In black and white, it tells them that they are either where they need to be (great job, keep it up) or somewhat behind (now’s the time to kick it into gear). Be honest with those that are below grade level. Let them knowthat in order for them to catch up, they’re going to have to put in the work. It’s totally doable because I’ve seen it happen… but they need to put in the effort!

Finally, try to come up with a realistic goal for when the 2nd diagnostic test is taken. For some students, this might be as simple as going up 10 points. For others, it might be to make it into the “gray zone”. And you might even have a few kiddos that you challenge to make it passed the “gray zone”. The key is for each child to set their own individualized goal (with your help, of course).

For any program to be effective, parents have to buy-in to what you’re doing
For starters, parents need to understand that i-Ready is tailor-made for their child! I like to tell them that it’s kinda like free tutoring. Their faces usually lightup once I say this… and it’s perfect for those that ask how they can help their child at home.
Sharing data with them is also pretty powerful. When they see on paper where their child is at, compared to where they’re SUPPOSED to be, many of them have AH-HA moments … and some even OH NOOOOO moments!
THAT’S WHAT YOU WANT!!!! You want them to be as excited about the program as you are… You want parents to take an active role in helping you monitor their child’s progress. It will make your life SOOOOOOO much easier if you can get them on board.
So what report should you print when meeting with your parents? Once your students take the Diagnostic/ placement test, print individual “Student Diagnostic Results” Reports. This report is easy enough for parents to understand, and will allow them to see their child’s strengths and weaknesses. Follow these simple steps…

First, select the REPORTS tab from your dashboard.

Then under Diagnostic Results select either READING or MATH.

Finally, select a student name from the drop-down menu.

Print a copy for yourself + one for your parents.
After you’ve printed the report and reviewed it, schedule individual parent conferences. Begin by focusing on the blue bar graph. I like to tell my parents that the green “On Grade Level” area is where their child should be.The blue bar graph shows where their childis. So if they’re in the “green” that’s good
Next, I like to discuss the “Overall” section where things are broken down by domain. This is where you can show them where their child’s strengths are and what areas they really need to work on. If you see “Tested Out” that just means that the kiddo does not need personalized instructionin that domain. In other words, he will not receive i-Ready lessons in that domain. Now put those “tested out” domains aside and take a look at what’s left. Sharestrengths + weaknesses with parents. I also like to let them know that the lowest scoring domain is where i-Ready instruction is going to begin.
I hope, you’re leaving here today with a few new ideas!
If you have any questions about any of the tips I’ve shared above, please let me know in the comments section down below. I’d love to hear from you

Feel free to use the image above to save this post to Pinterest.
You’ll find more reading resources on myElementary Reading IdeasPinterest board.

DOWNLOAD THIS FREEBIE NOW!
Help students monitor their progress on all i-Ready Diagnostic tests using these Recording Sheets...
Simply enter your information down below and check your inbox!
Written by
Melissa
A third-grade teacher with a passion for creating time-saving classroom resources. She enjoys sharing her attempt to juggle it all... grading papers, lesson planning, student referrals, parent communication, test prep, and so much more all while managing a busy home life with two active teens.
